Notice Module User Manual
Login as Superadmin
After logging in, you’ll be directed to the Super admin Dashboard.
-
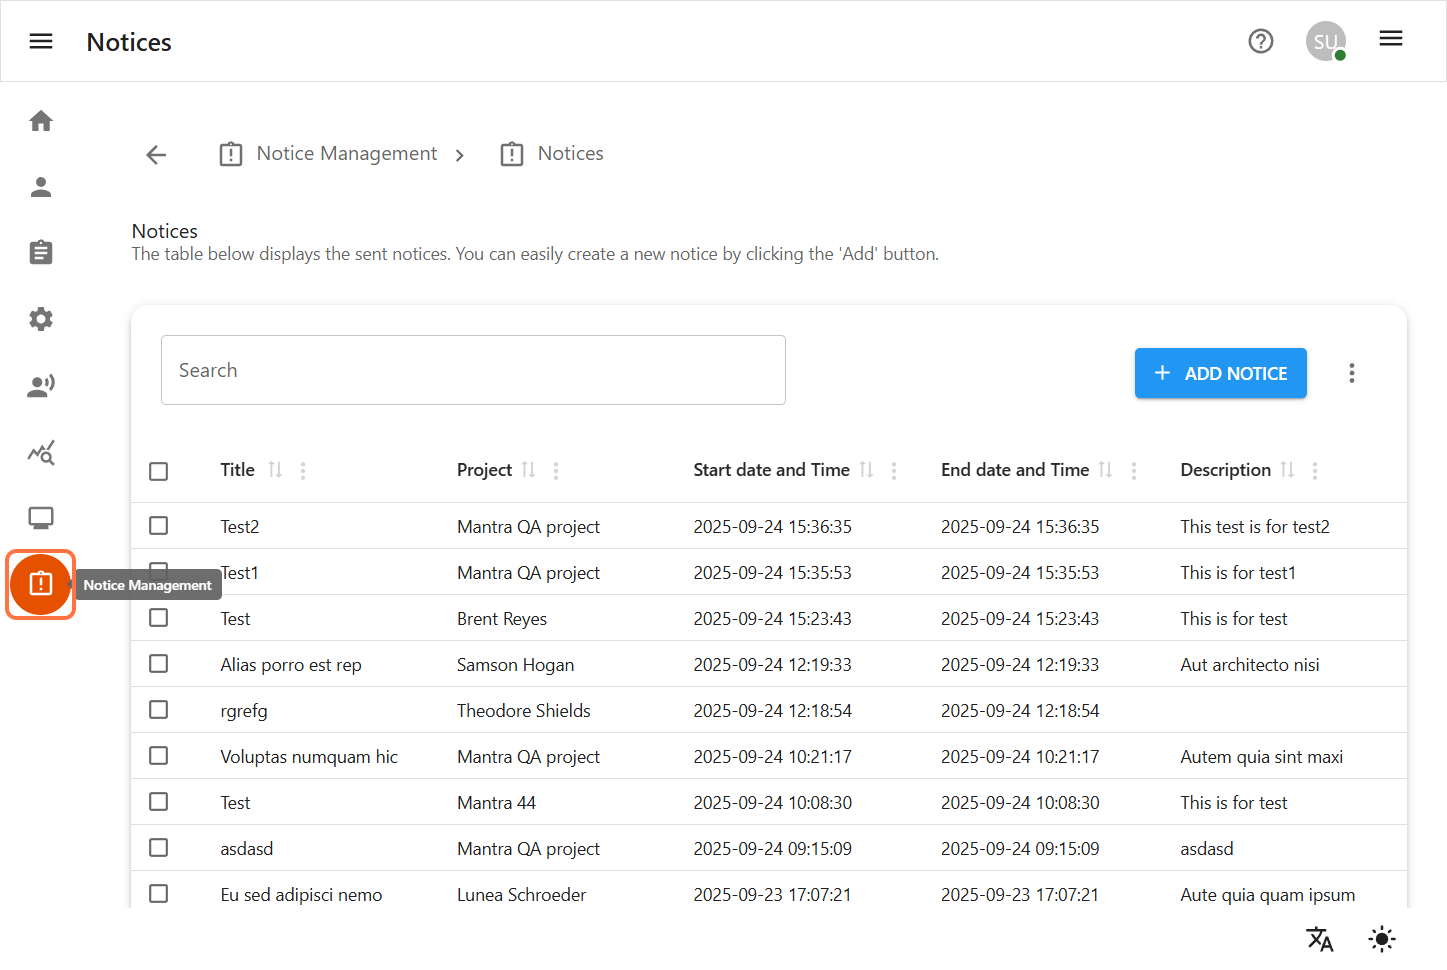
From the Dashboard, click on the Notice Management icon located on the navigation menu.
-
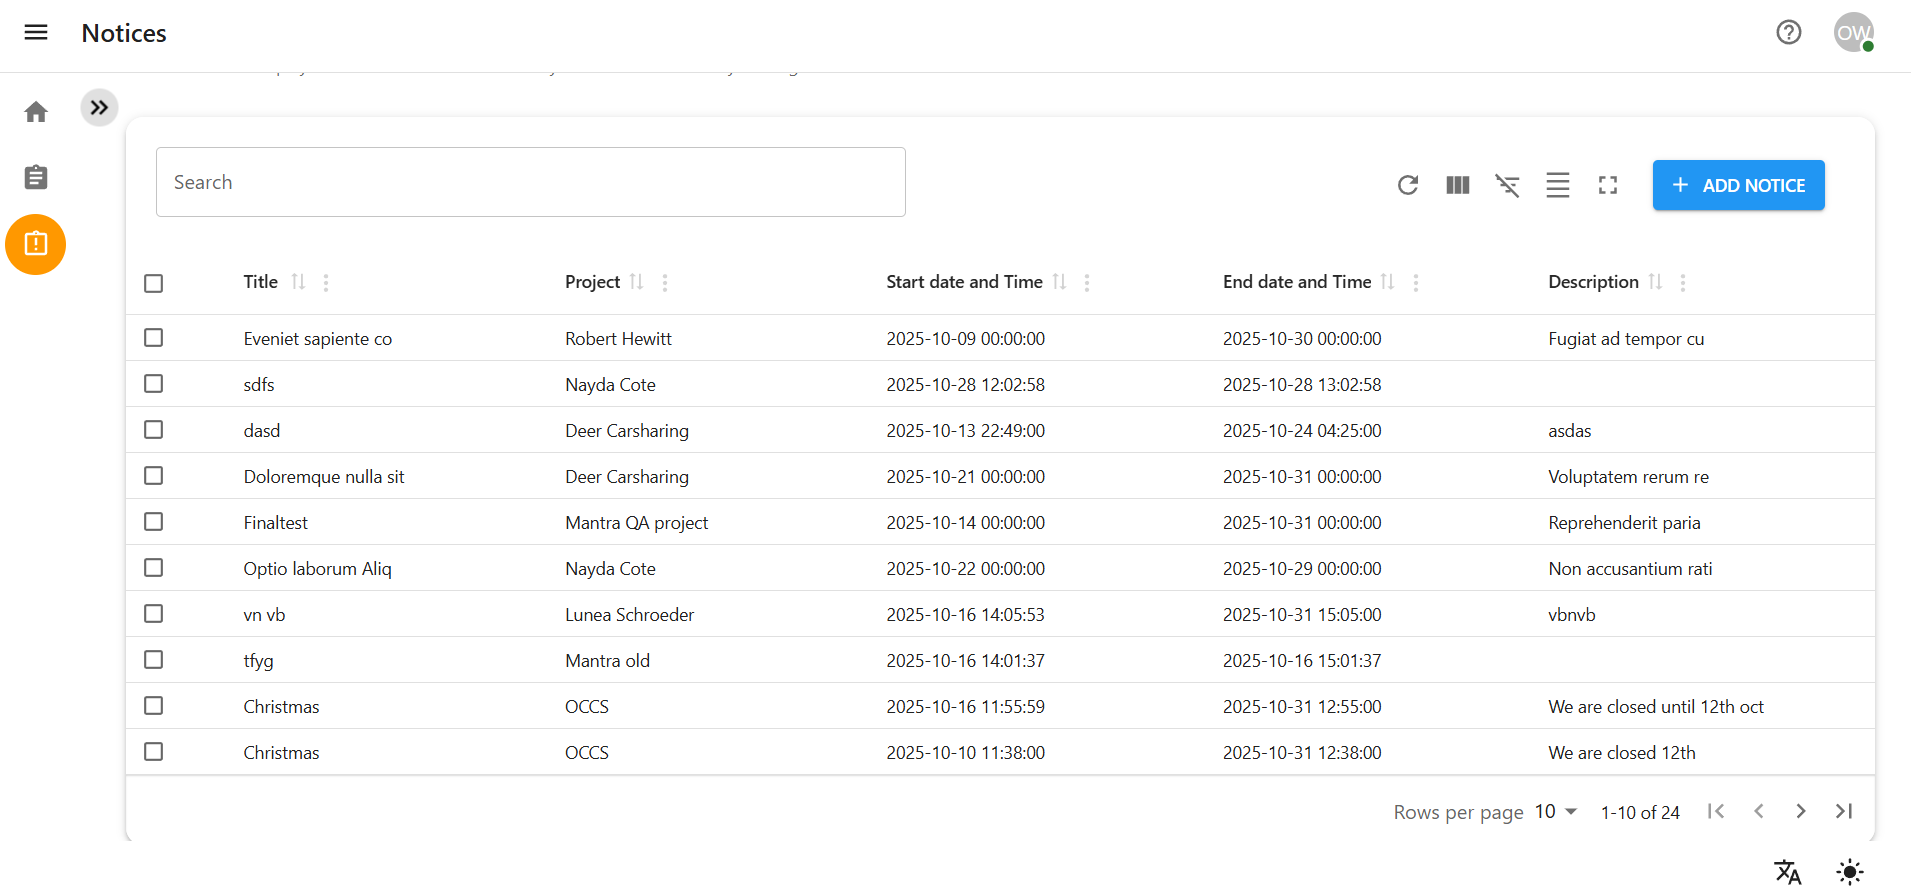
You will be redirected to the Notice Management Page.
-
Inside Project owner you can only access the project which are assigned to you.
1 Notices
The Notice Module enables administrators to create, manage, and publish important announcements for users according to project. Each notice is assigned a title, message, priority, start date and time, end date and time. Projects ensuring relevant information reaches the correct users in a timely manner.
Notice Fields in Notice Management
Inside Notice Management, each Notice contains the following key fields:
-
Title: A clear and concise heading that summarizes the notice’s content.
-
Message: The main body of the notice containing the detailed announcement or information.
-
Priority: In priority dropdown we have three different field (High, Medium, low) to indicate the importance of the notice.
-
Start Date and Time: The date and time when the notice becomes active and visible to the targeted users. Start date is always before then end date.
-
End Date and Time: The date and time when the notice will be automatically archived and no longer visible.
-
Projects: Select the project(s) to which the notice applies. Only users associated with these projects will see the notice.
1.1 Create Notice
-
Step-by-step instructions for creating a notice.
Navigate to Notice Management
-
From the left sidebar, click on the Notice Management icon.
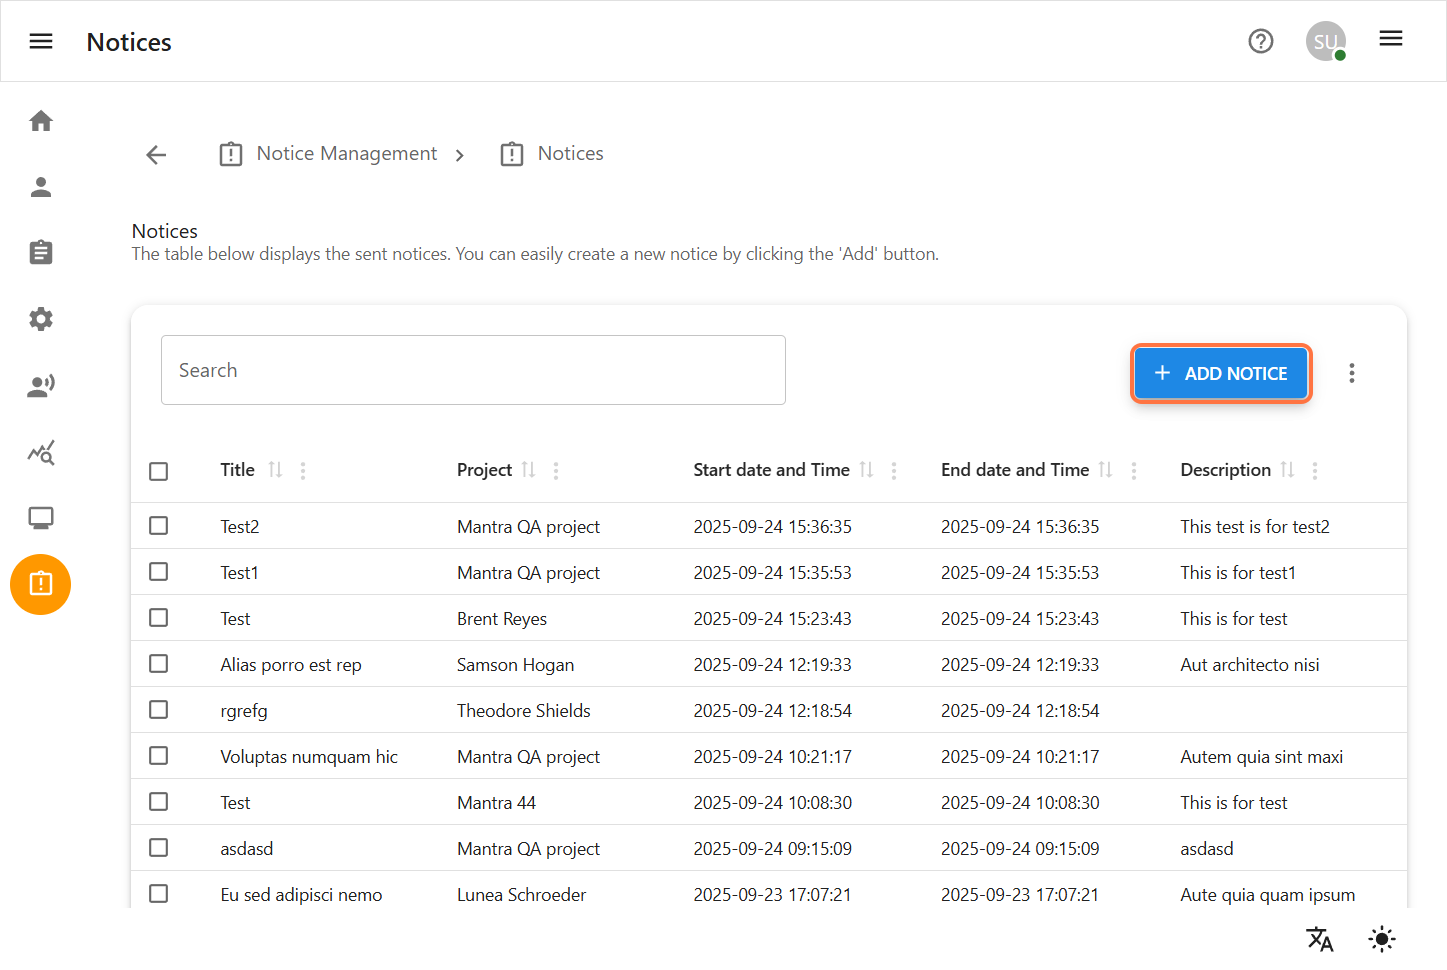
Add a New Notice
-
On the Notice Management page, click the Add Notice button to begin creating a new notice.
-
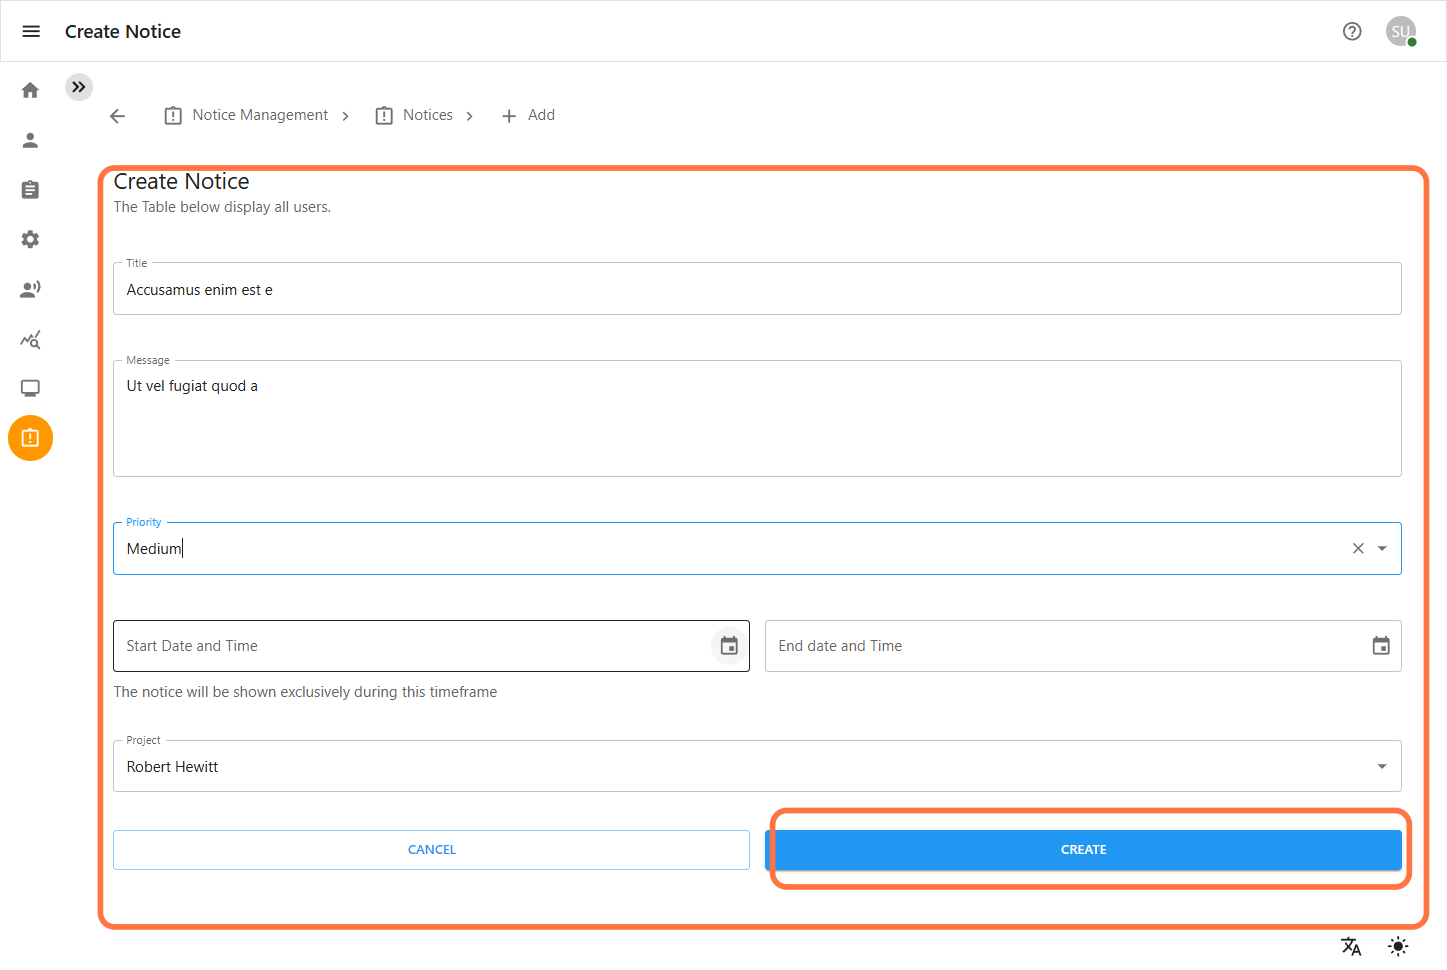
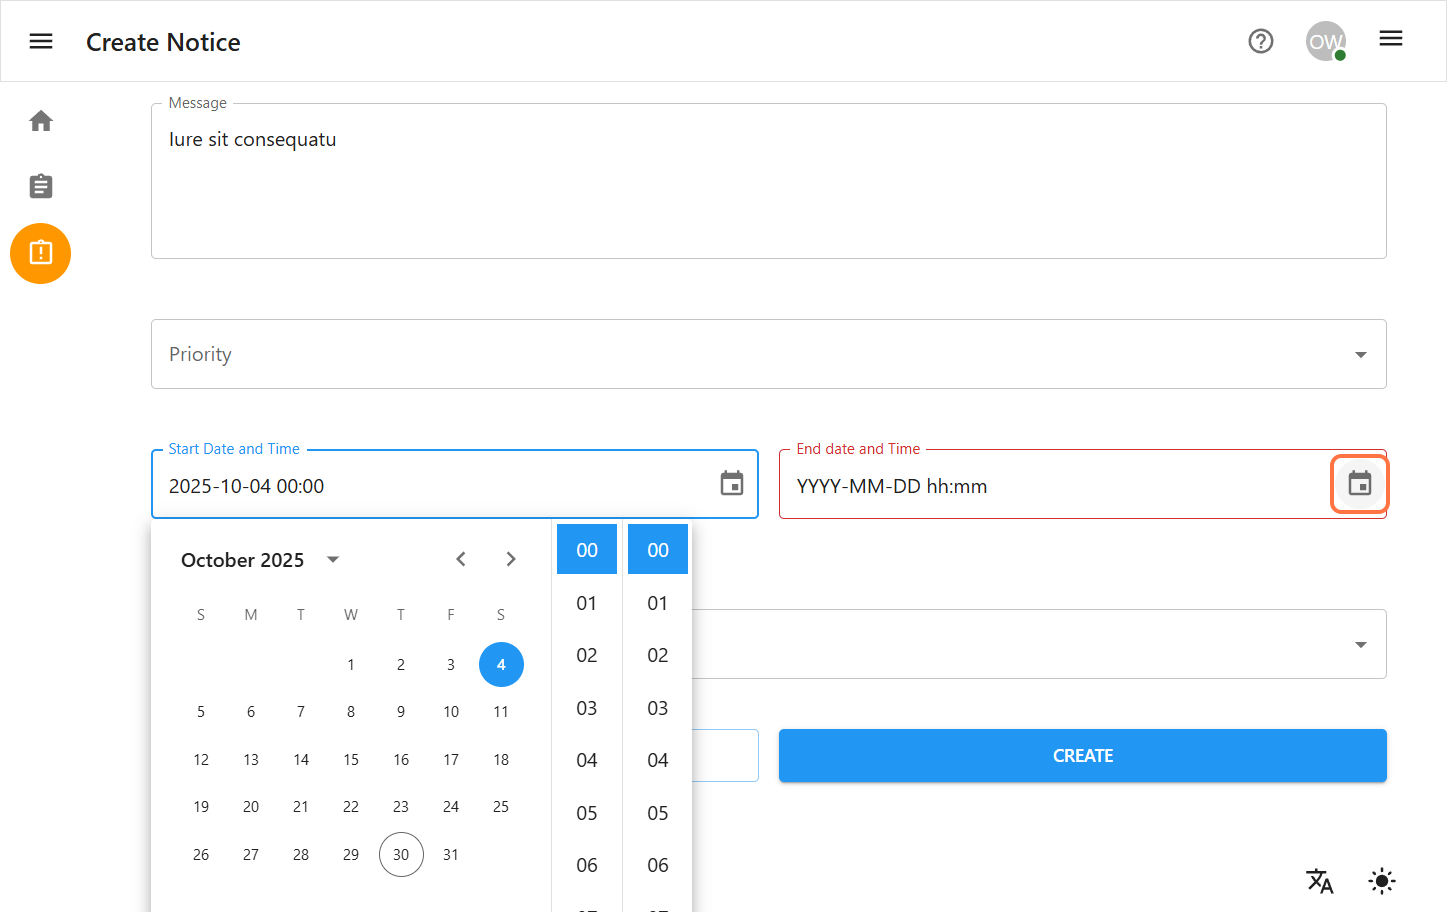
Complete the Notice Details Form
-
Fill out the required fields with valid data.
-
Title: Enter a clear and descriptive title for the notice.
-
Content: Use the text editor to write the full content of your notice.
-
Priority: Select the priority level (e.g., Low, Medium, High) to indicate the importance of the notice.
-
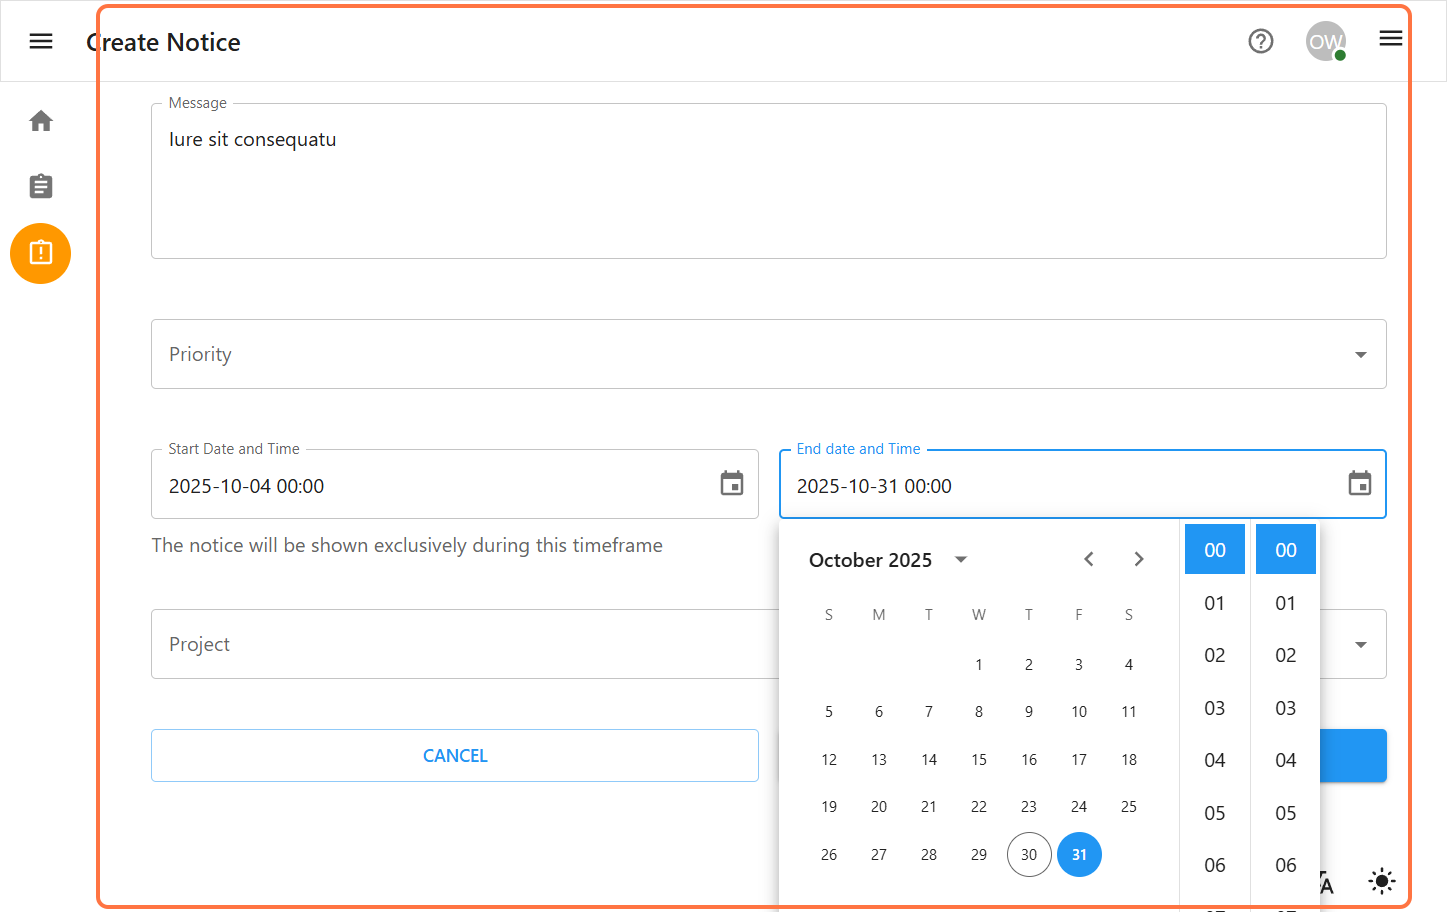
Start/End Date & Time: Select the period during which the notice shoud be active. Start date and time is always before then end date and time.
-
Projects: Select the project(s) to which the notice applies. Only users associated with these projects will see the notice.
-
-
Click the Next button to proceed to the Review page.
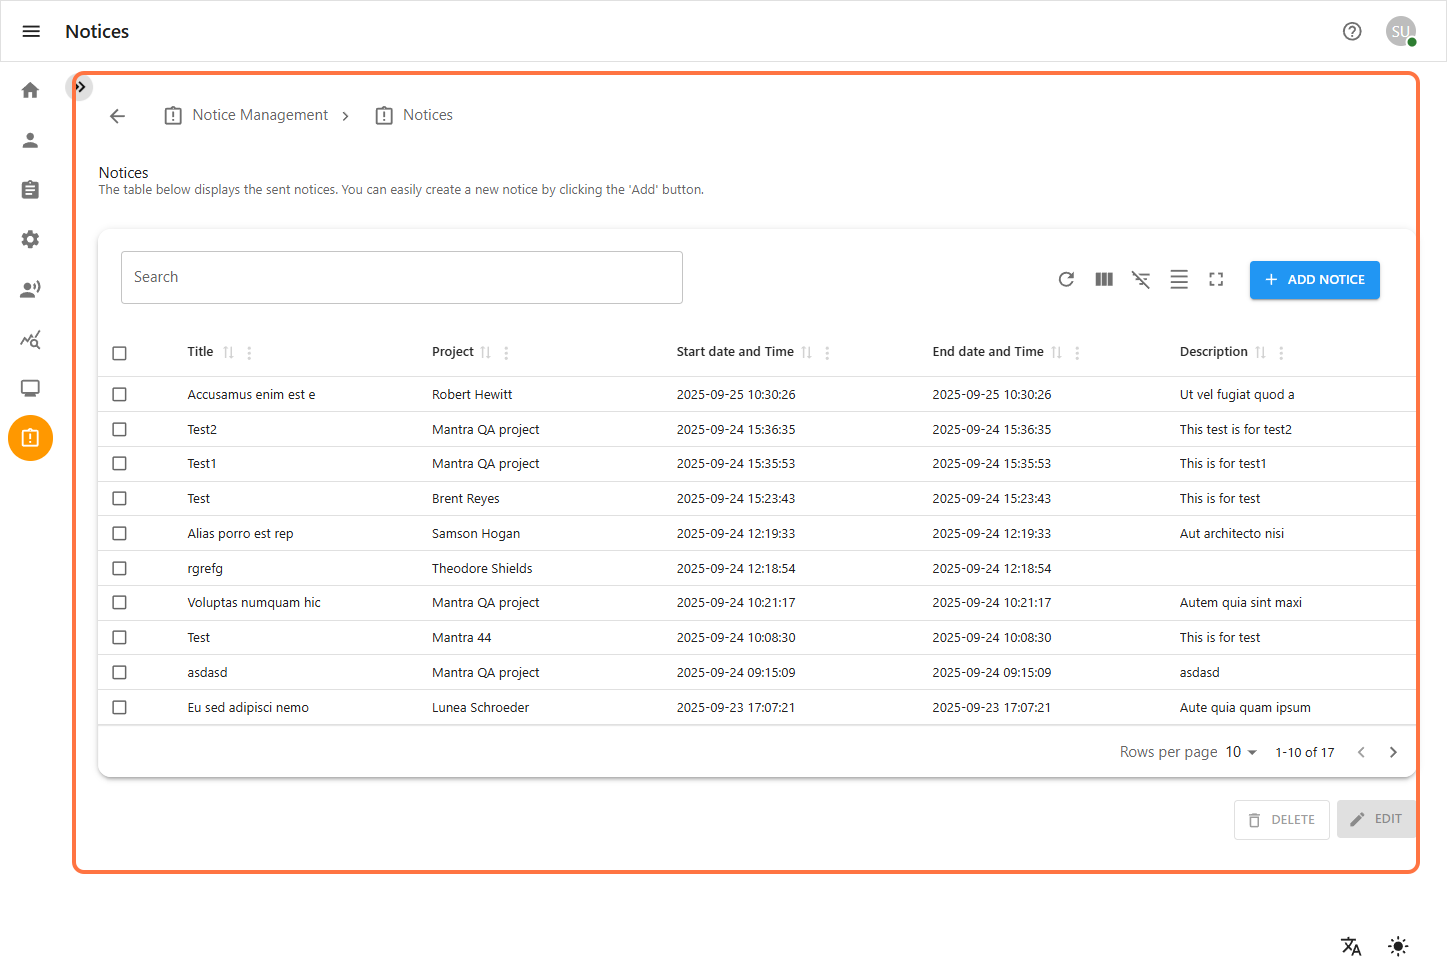
-
Then you will be redirected to the notice list page where you can see all the details.
1.2 Edit a Notice
-
Step-by-step instructions for editing an existing notice.
-
Navigate to Notice Management
-
From the left sidebar, click on the Notice Management icon.
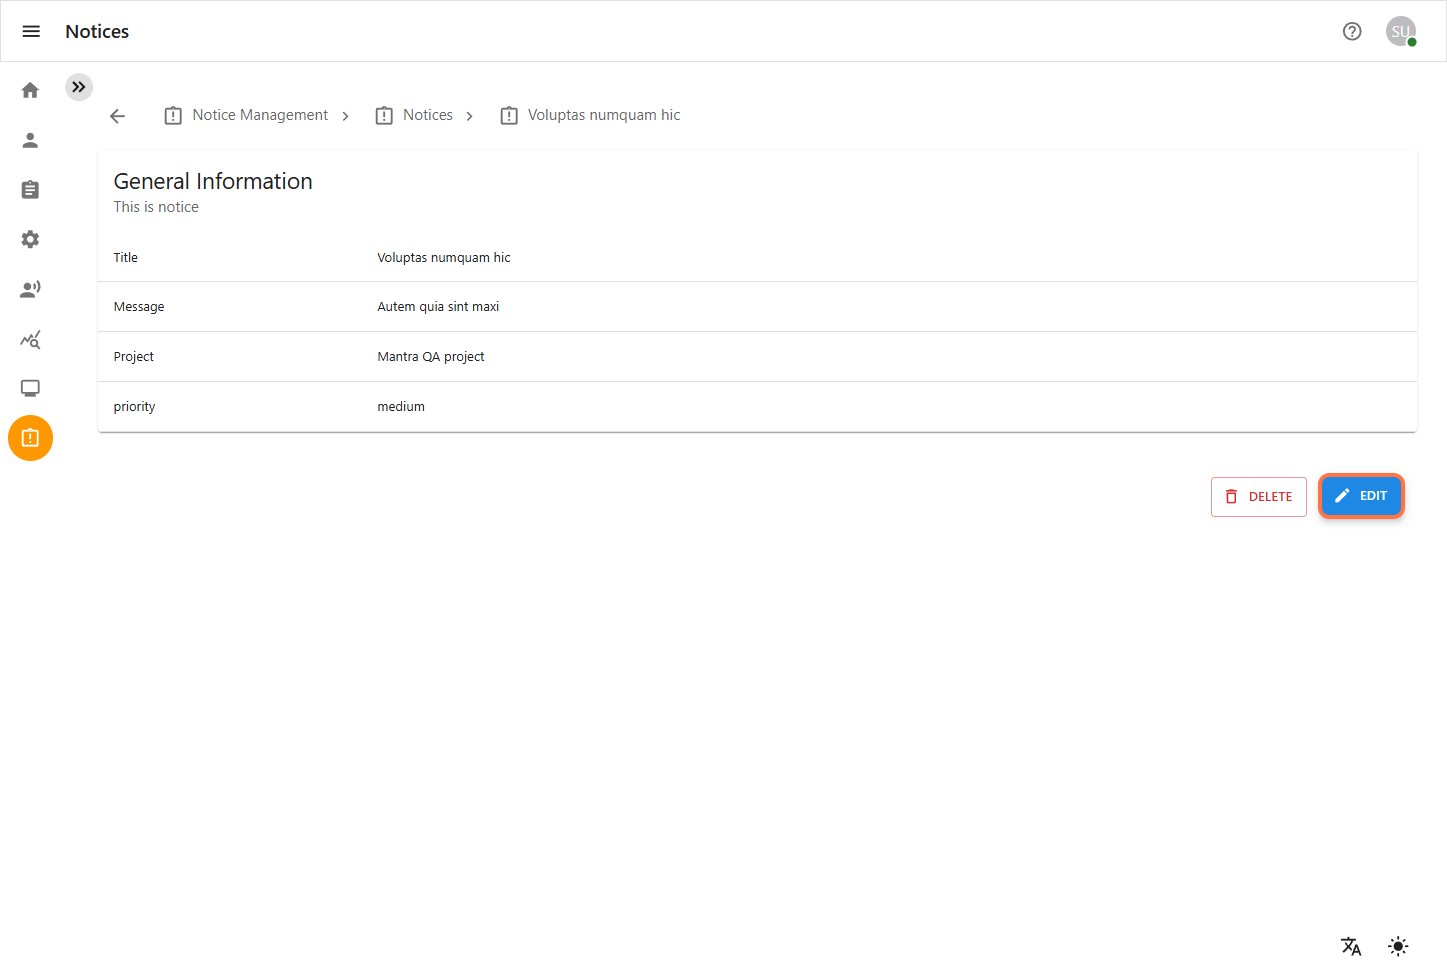
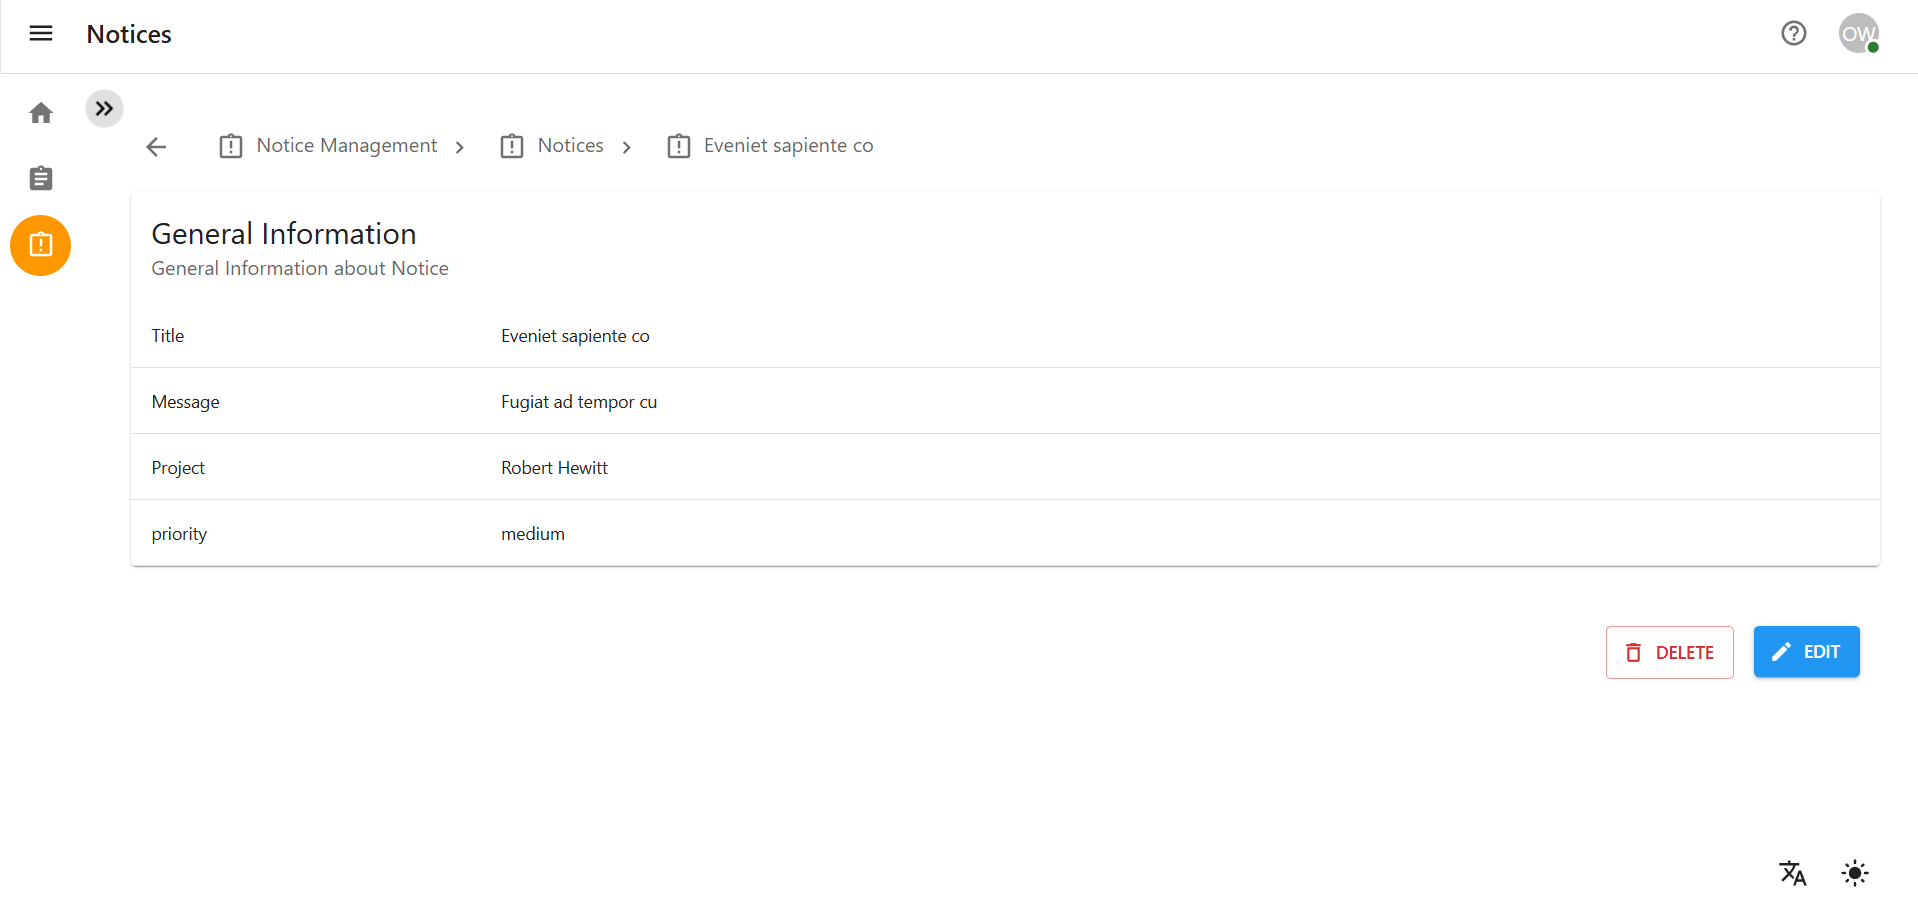
Select a Notice to Edit
-
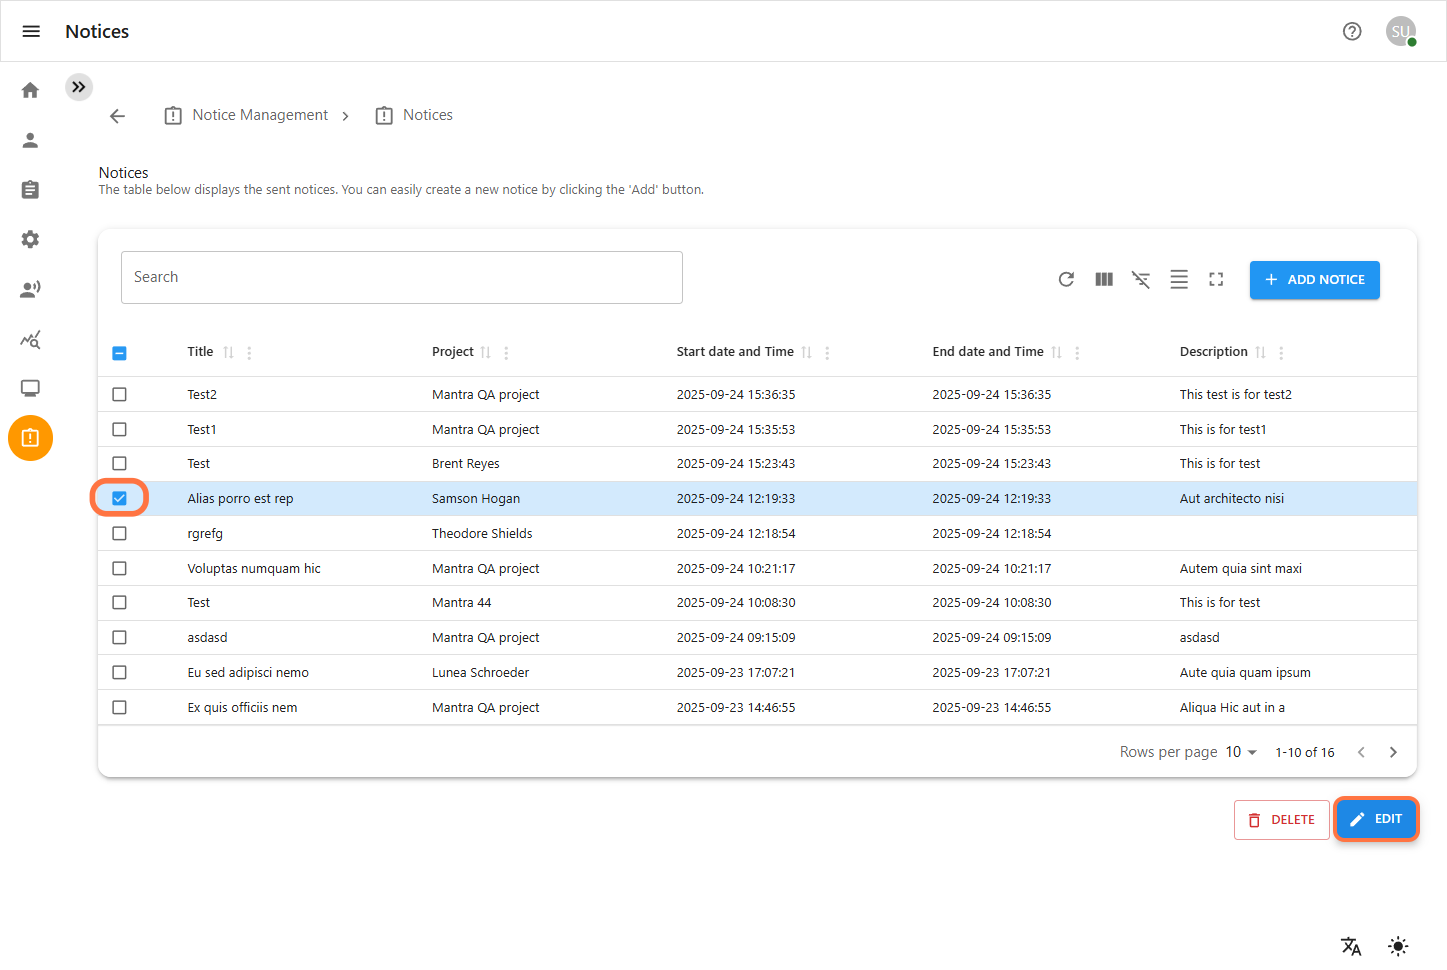
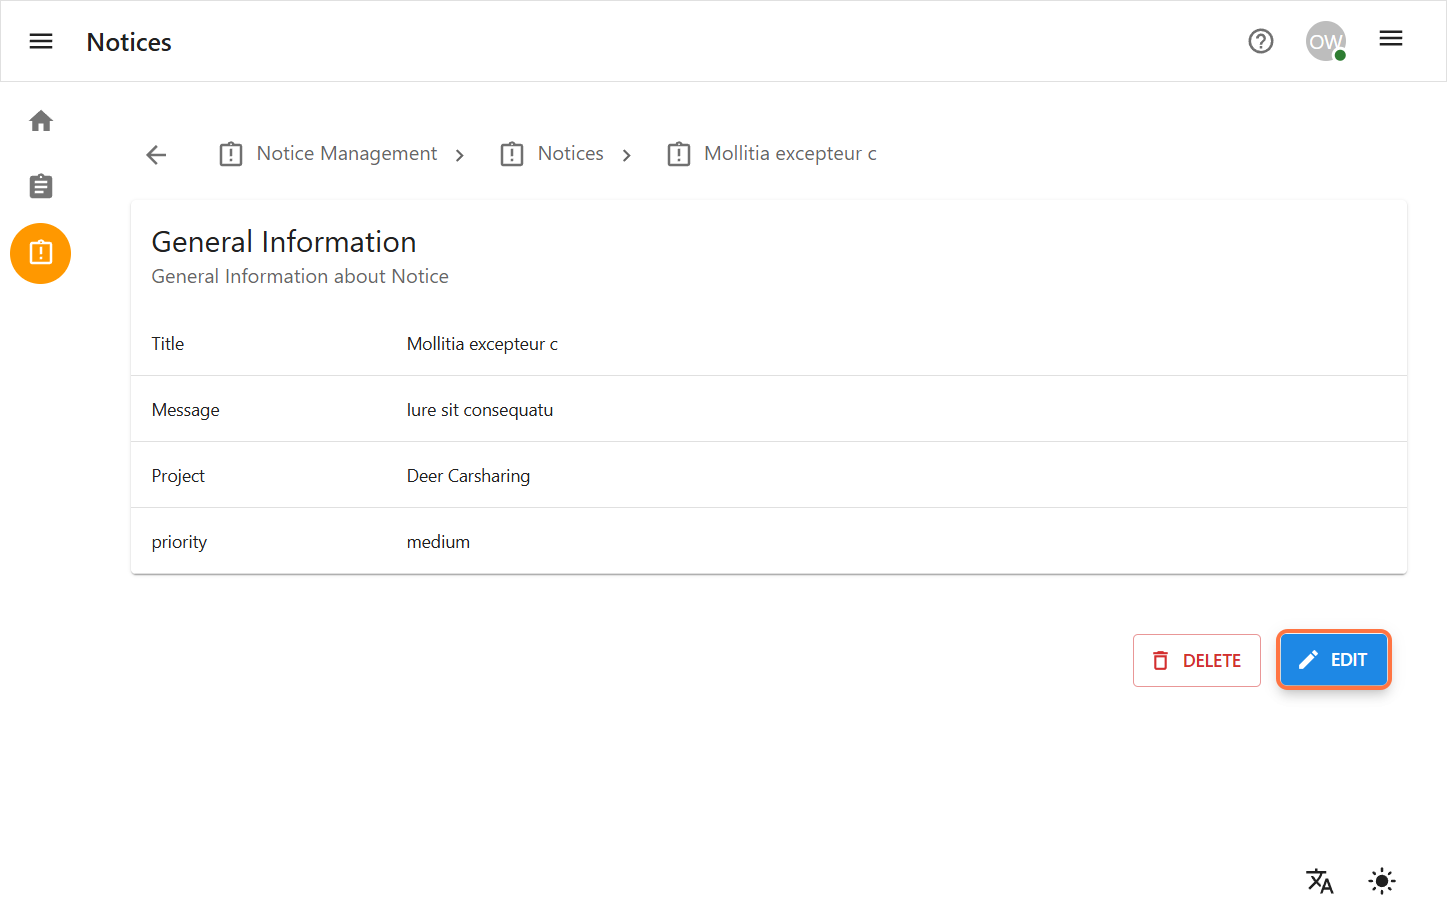
On the Notice view page, find the notice you want to edit/update.
-
Select the checkbox next to the desired notice.
-
Click the Edit Notice button.

-
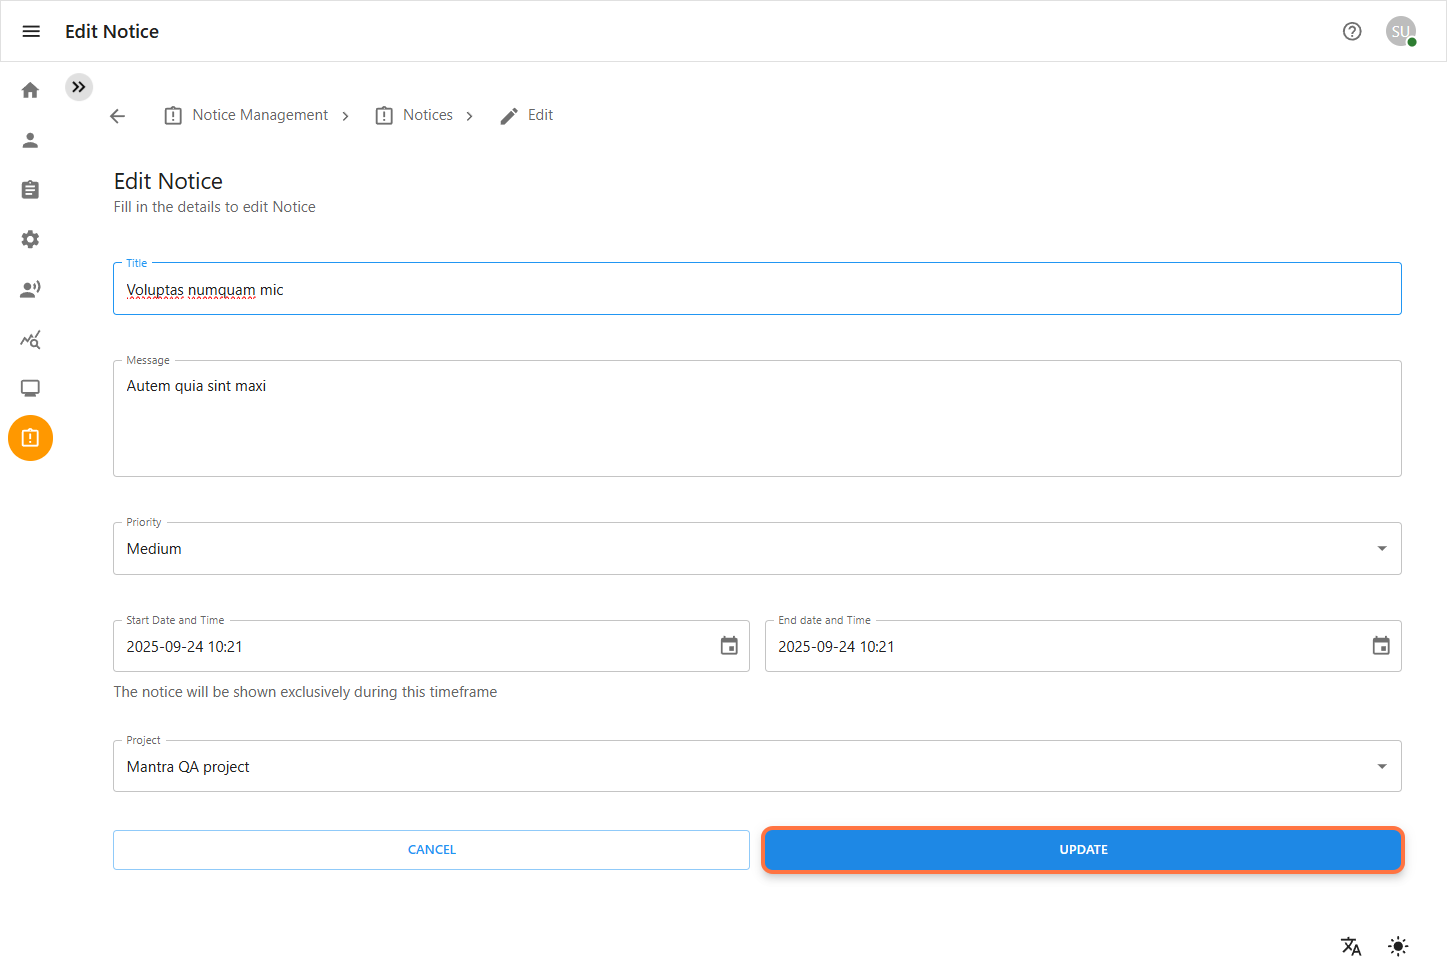
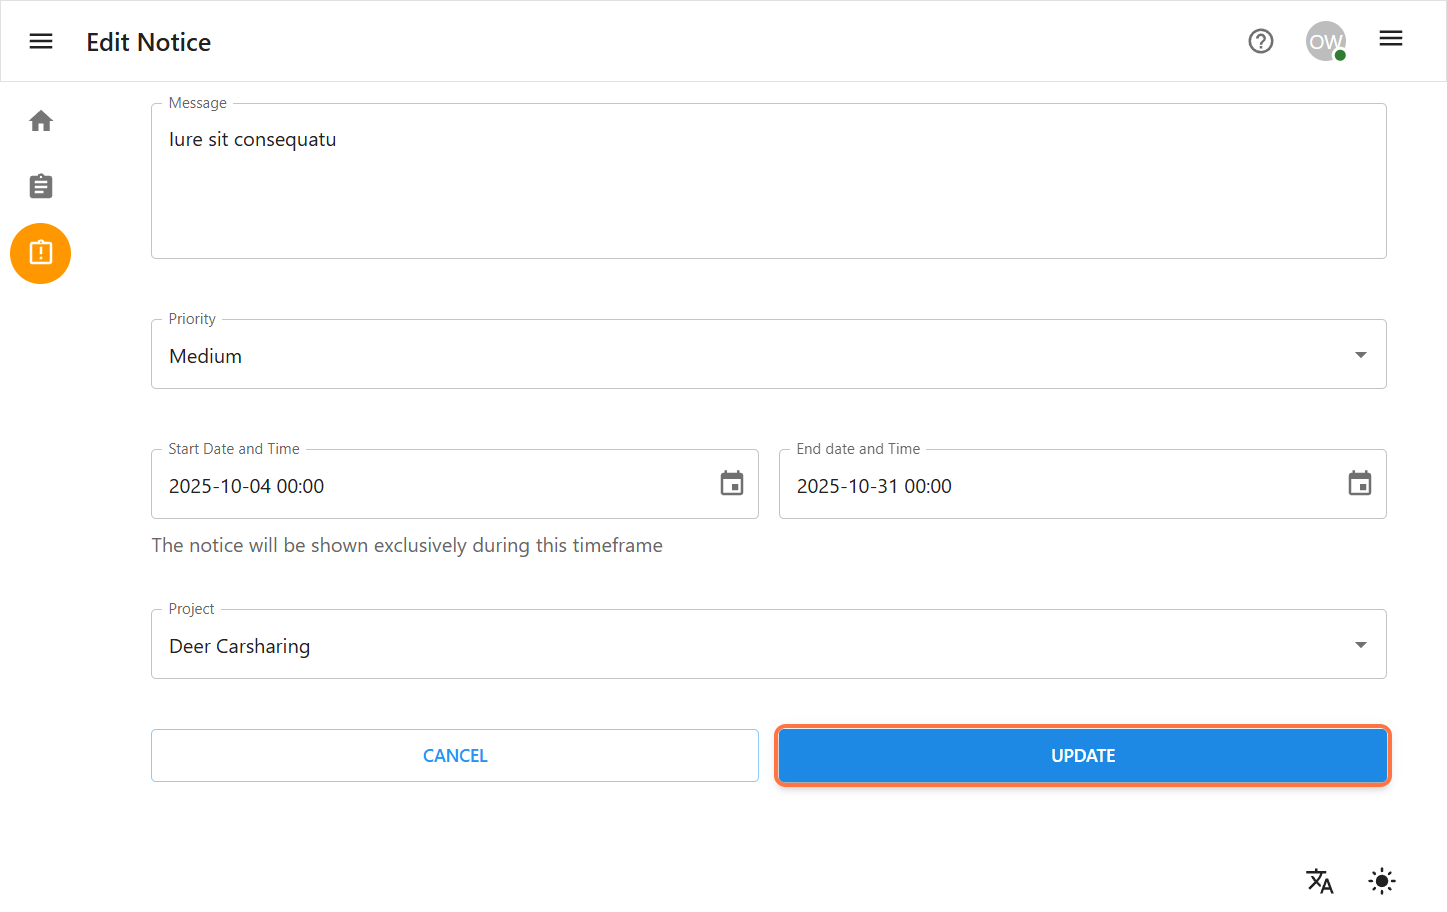
Update the Notice Details
-
You will be redirected to the Edit Notice form, pre-filled with the existing data.
-
Update any necessary fields (Title, Message, start and end Date/Time,priority and project).
-
Click the Next button and then the Update Notice button on the review page to save your changes.
-
1.3 Delete a Notice
-
Step-by-step instructions for deleting a notice.
-
Navigate to Notice Management
-
From the left sidebar, click on the Notice Management icon. You will be redirected to the Notice view page where all list of notice are displayed.
-
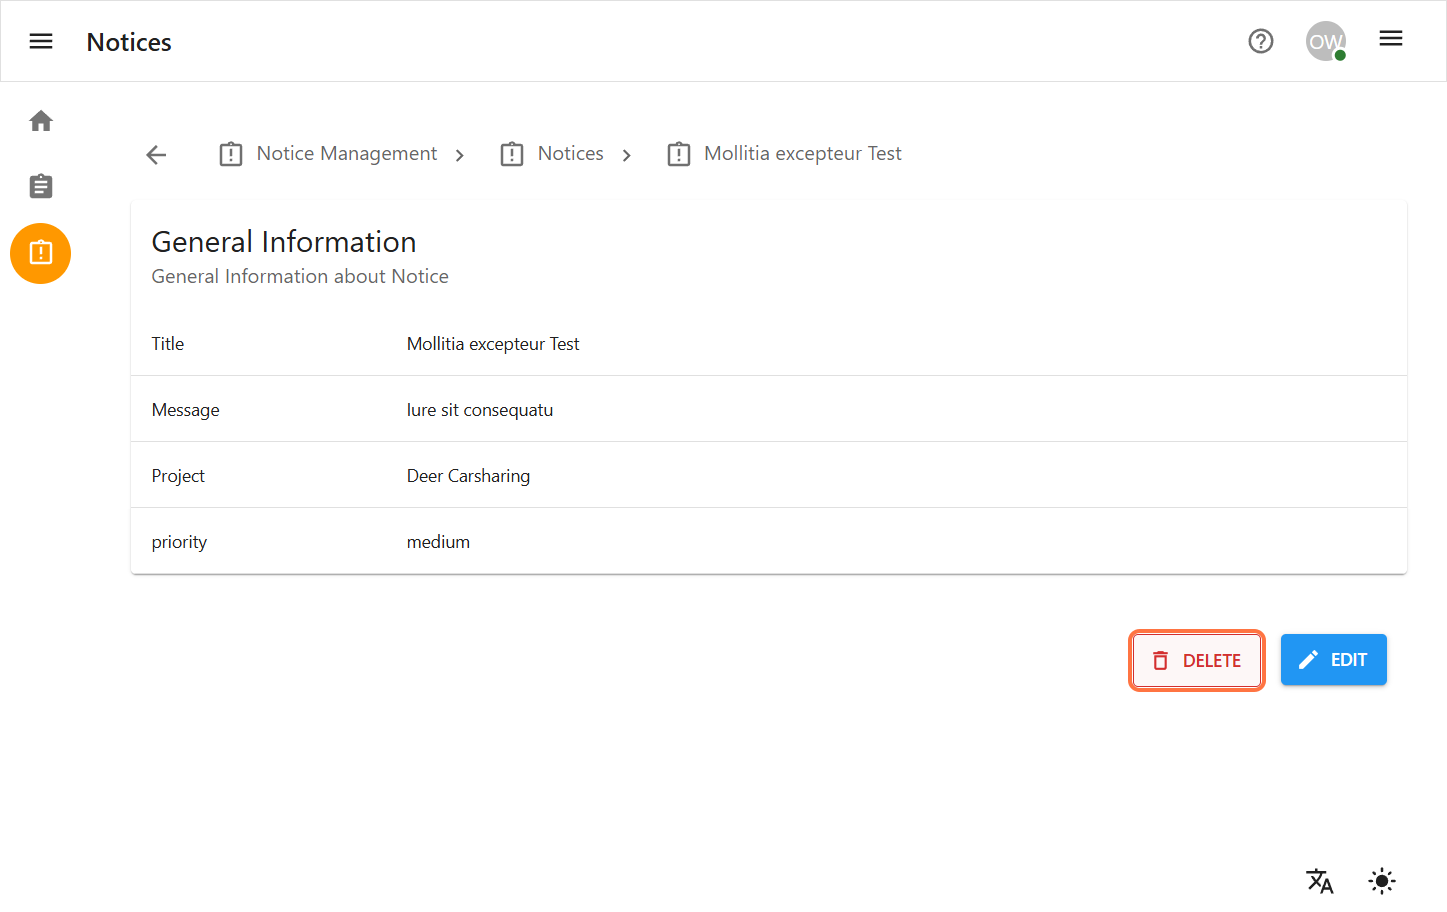
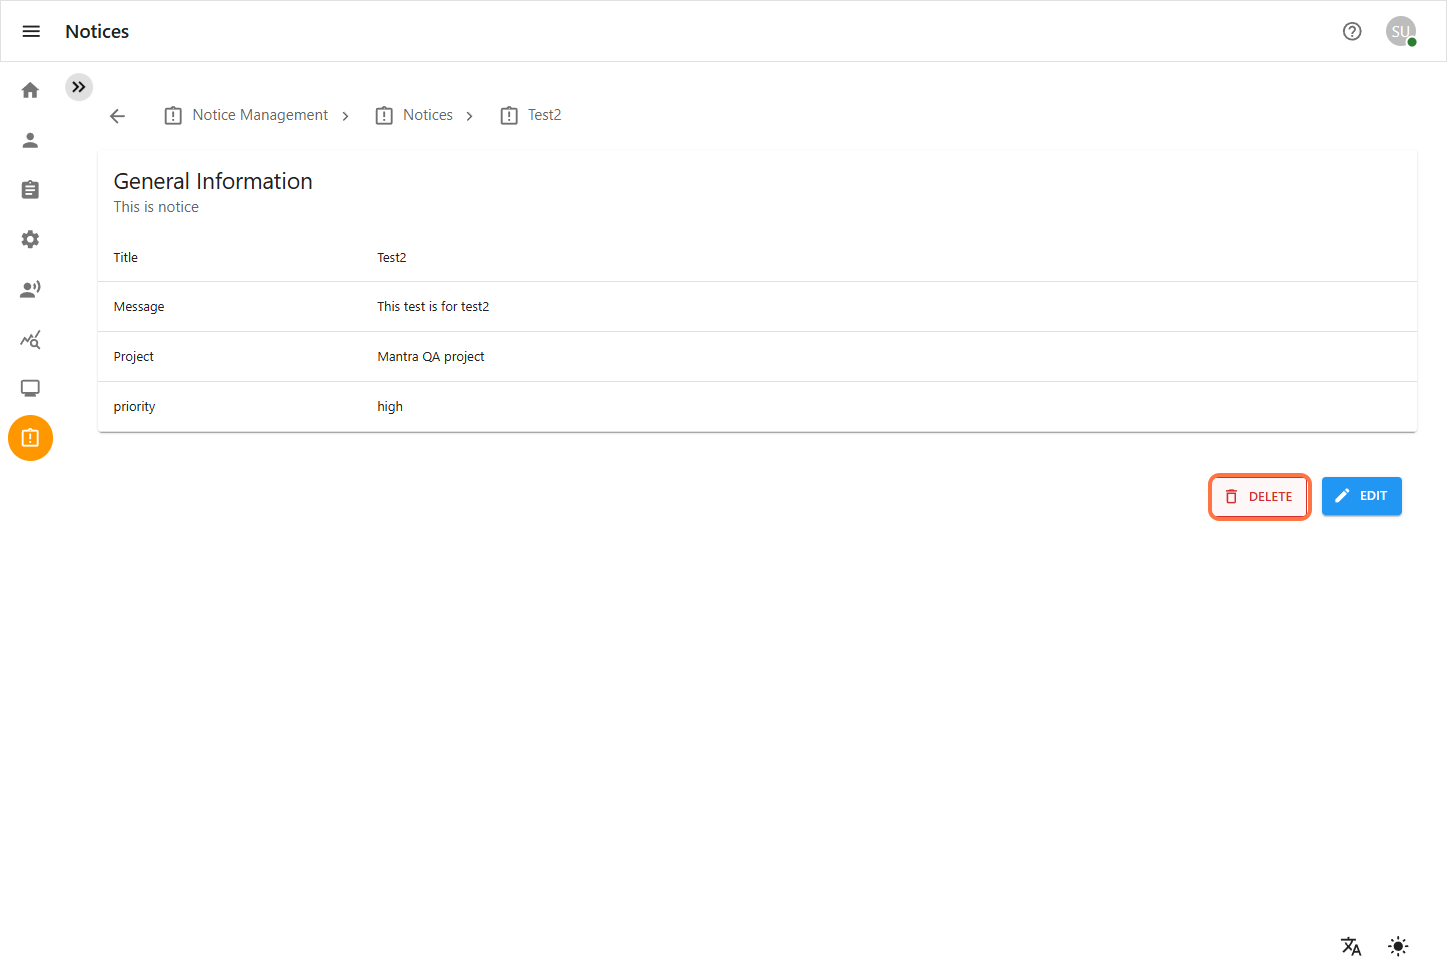
Delete a Single Notice
-
On the Notice Management page, find the notice you wish to delete.
-
Select the checkbox next to the desired notice.
-
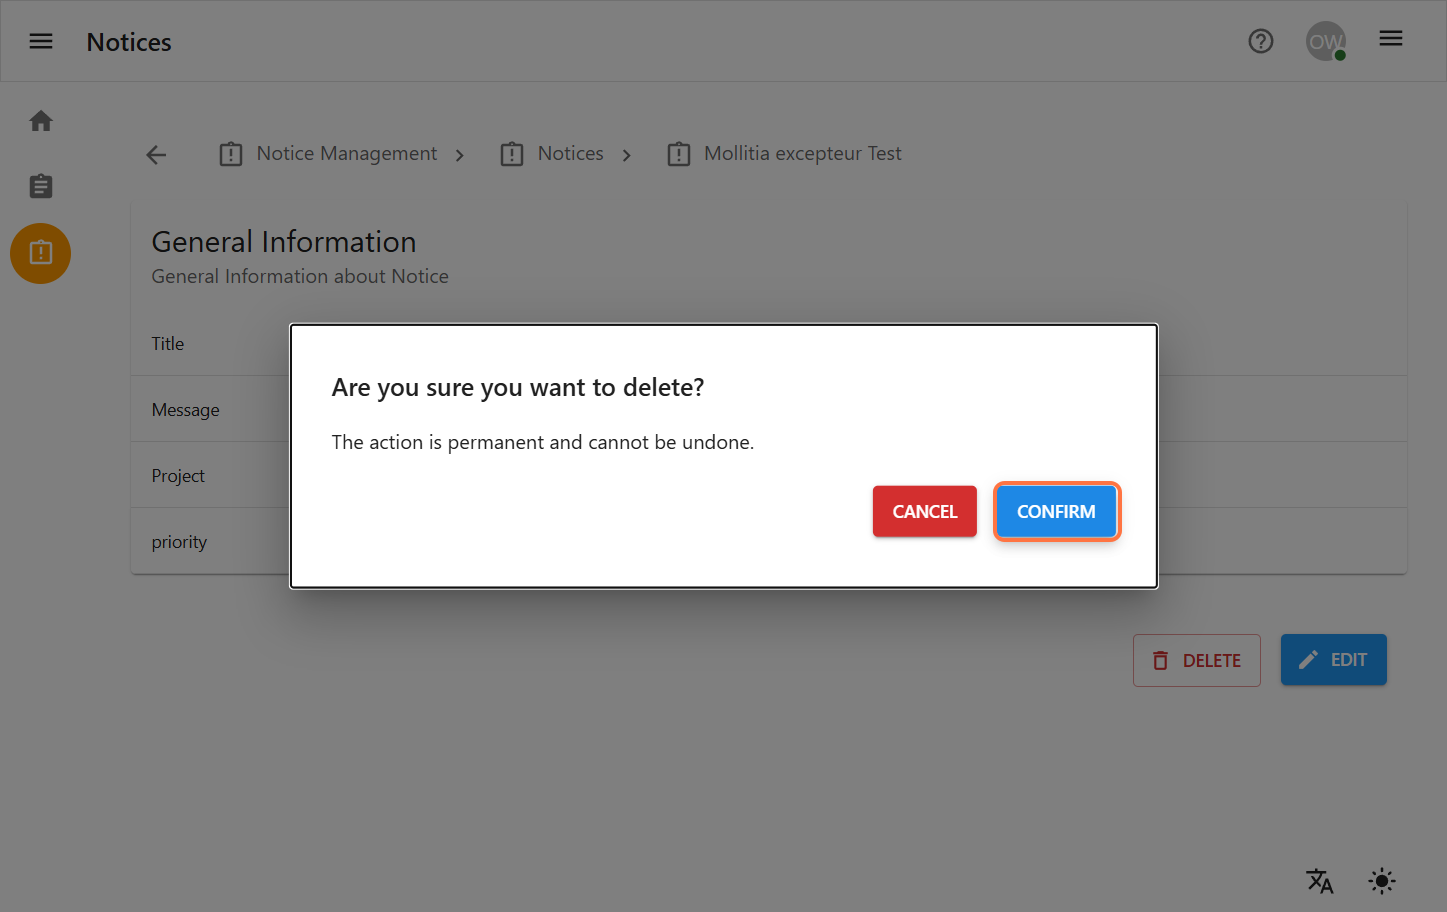
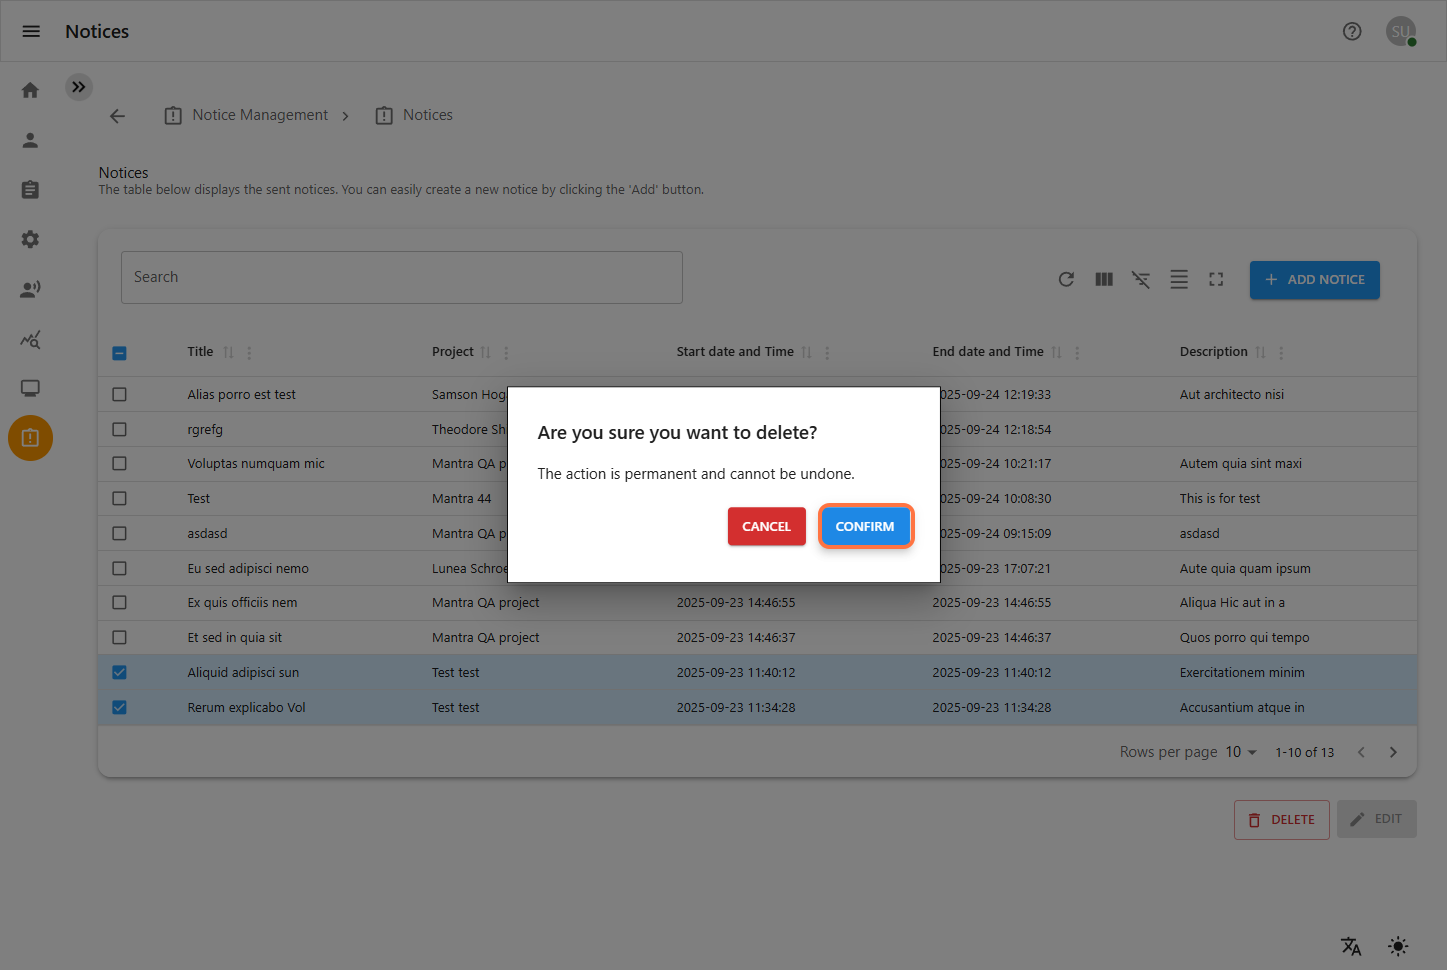
Click the Delete Notice button.
-
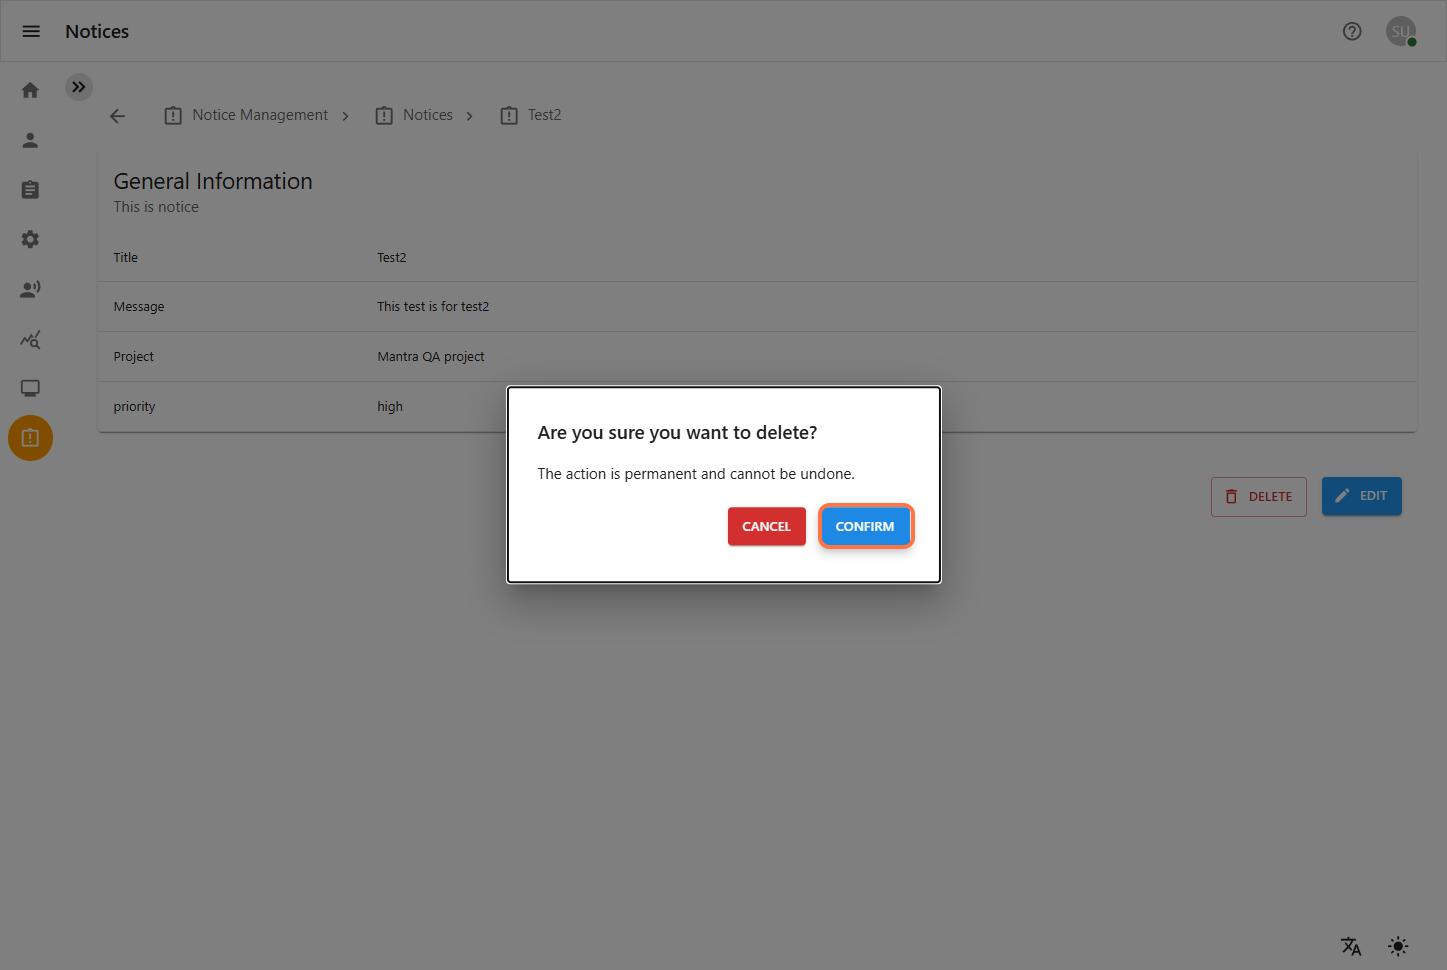
A confirmation dialog will appear. Confirm the deletion to permanently remove the notice.
-
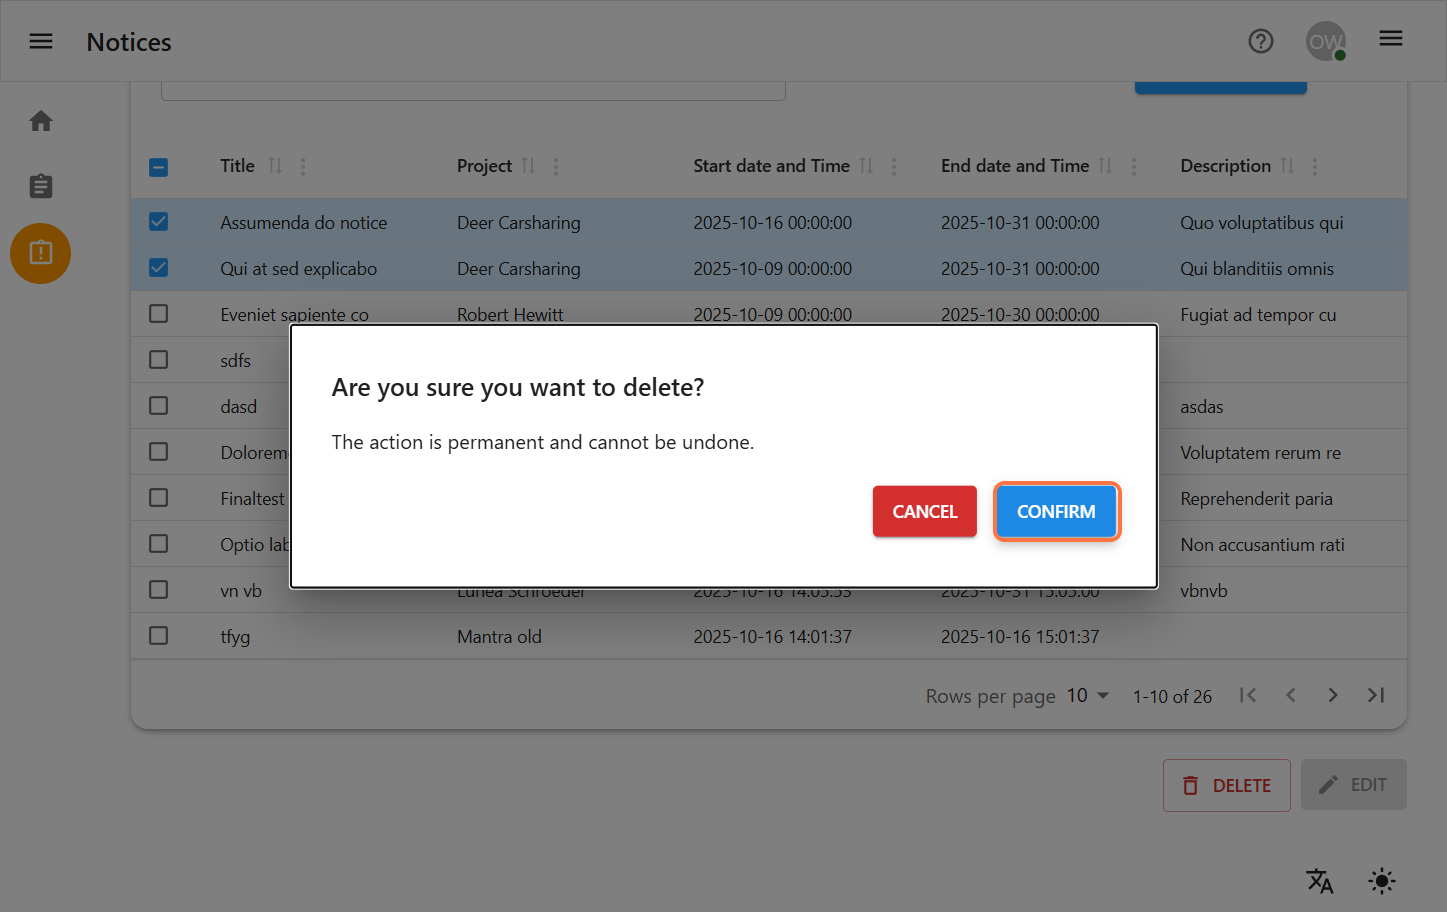
Delete Multiple Notices
-
On the Notice Management page, select the checkboxes for all notices you wish to delete.
-
Click the Delete Notice button.
-
A confirmation dialog will appear. Confirm the deletion to permanently remove all selected notices.
1.4 Viewing Active Notices
A notice is considered active when the current date and time fall within its scheduled start and end period.
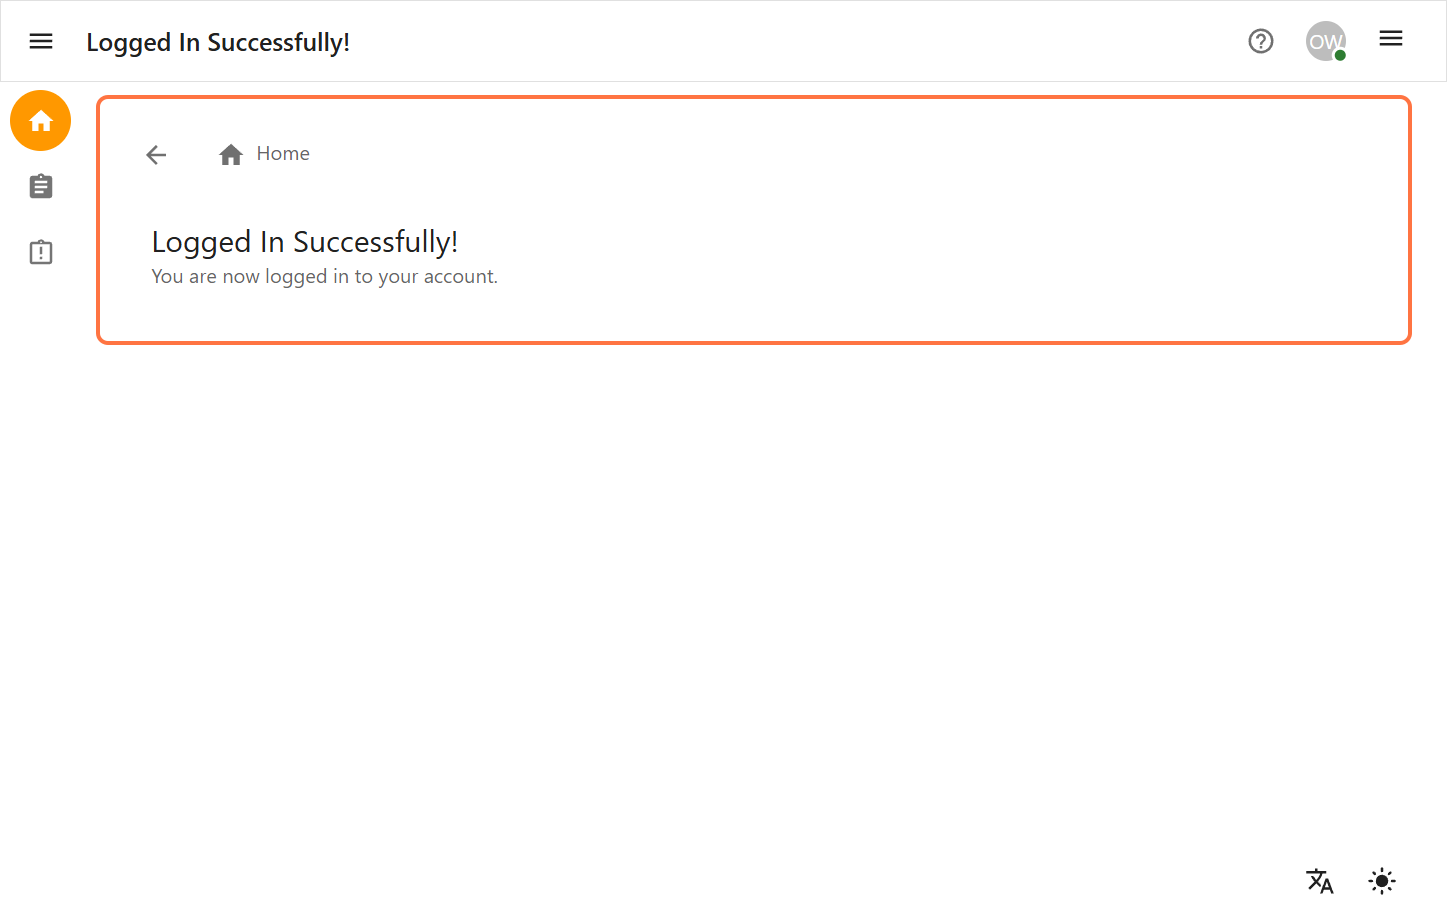
Login As Project Owner
After logging in, you’ll be directed to the Dashboard.
-
From the Dashboard, click on the Notice Management icon located on the navigation menu.
-
You will be redirected to the Notice Management Page.
Notice Fields in Notice Management
Inside Notice Management, each Notice contains the following key fields:
Title: A clear and concise heading that summarizes the notice’s content.
Message: The main body of the notice containing the detailed announcement or information.
Content: The main body of the notice containing the detailed announcement or information.
Priority: In priority dropdown we have three different field (High, Medium, low) to indicate the importance of the notice.
Start Date and Time : The date and time when the notice becomes active and visible to the targeted users. Start date is always before then end date.
End Date and Time: The date and time when the notice will be automatically archived and no longer visible.
Projects: Select the project(s) to which the notice applies. Only users associated with these projects will see the notice.In project owner you can only access the project which are assigned to you.
1.1 Create Notice
-
Step-by-step instructions for creating a notice.
Navigate to Notice Management
-
From the left sidebar, click on the Notice Management icon.
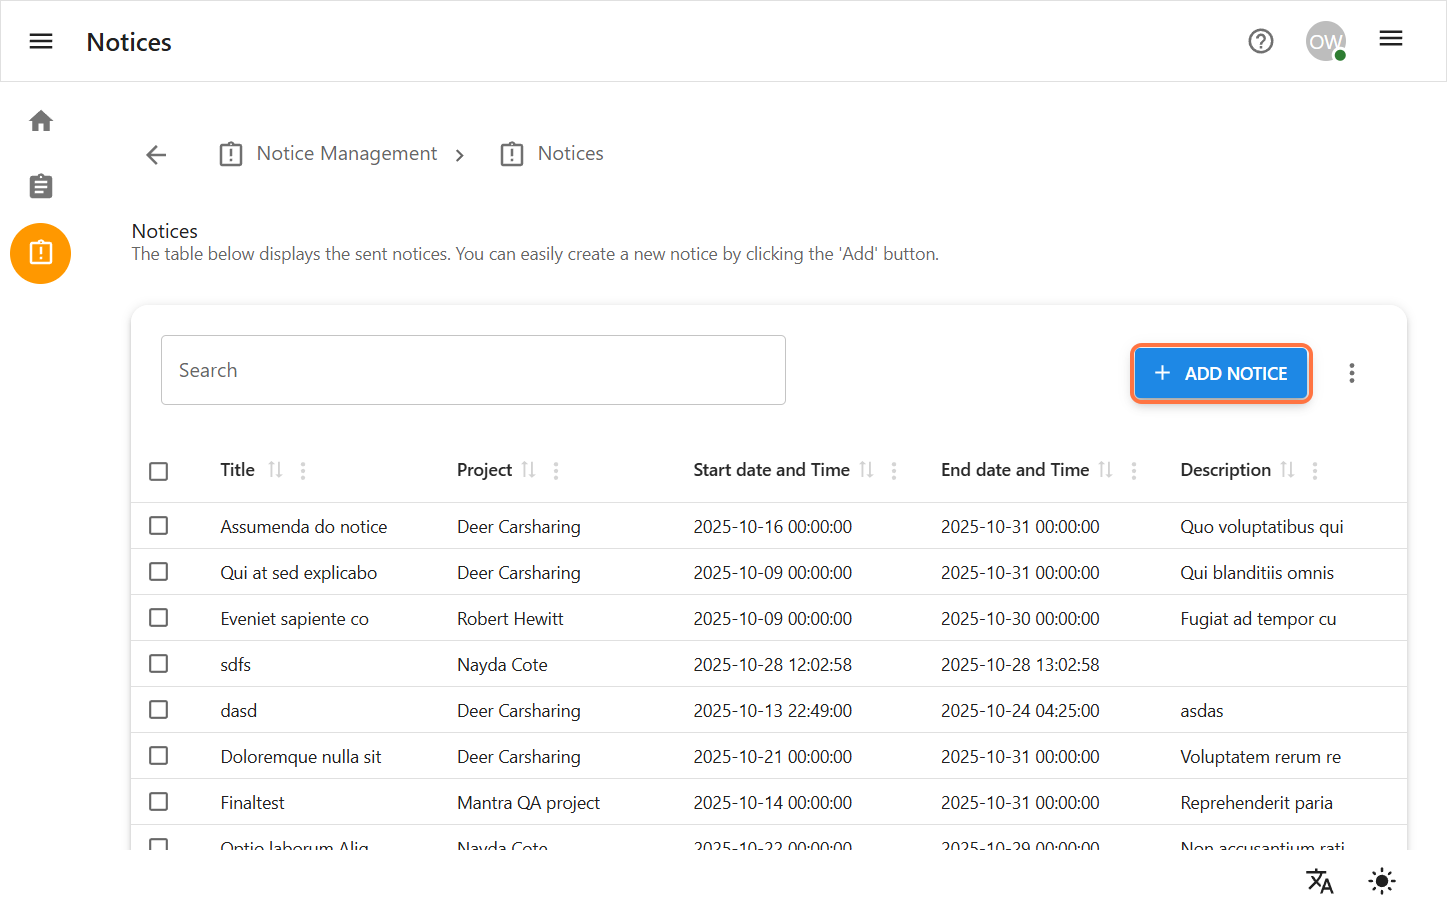
Add a New Notice
-
On the Notice Management page, click the Add Notice button to begin creating a new notice.
-
Complete the Notice Details Form
-
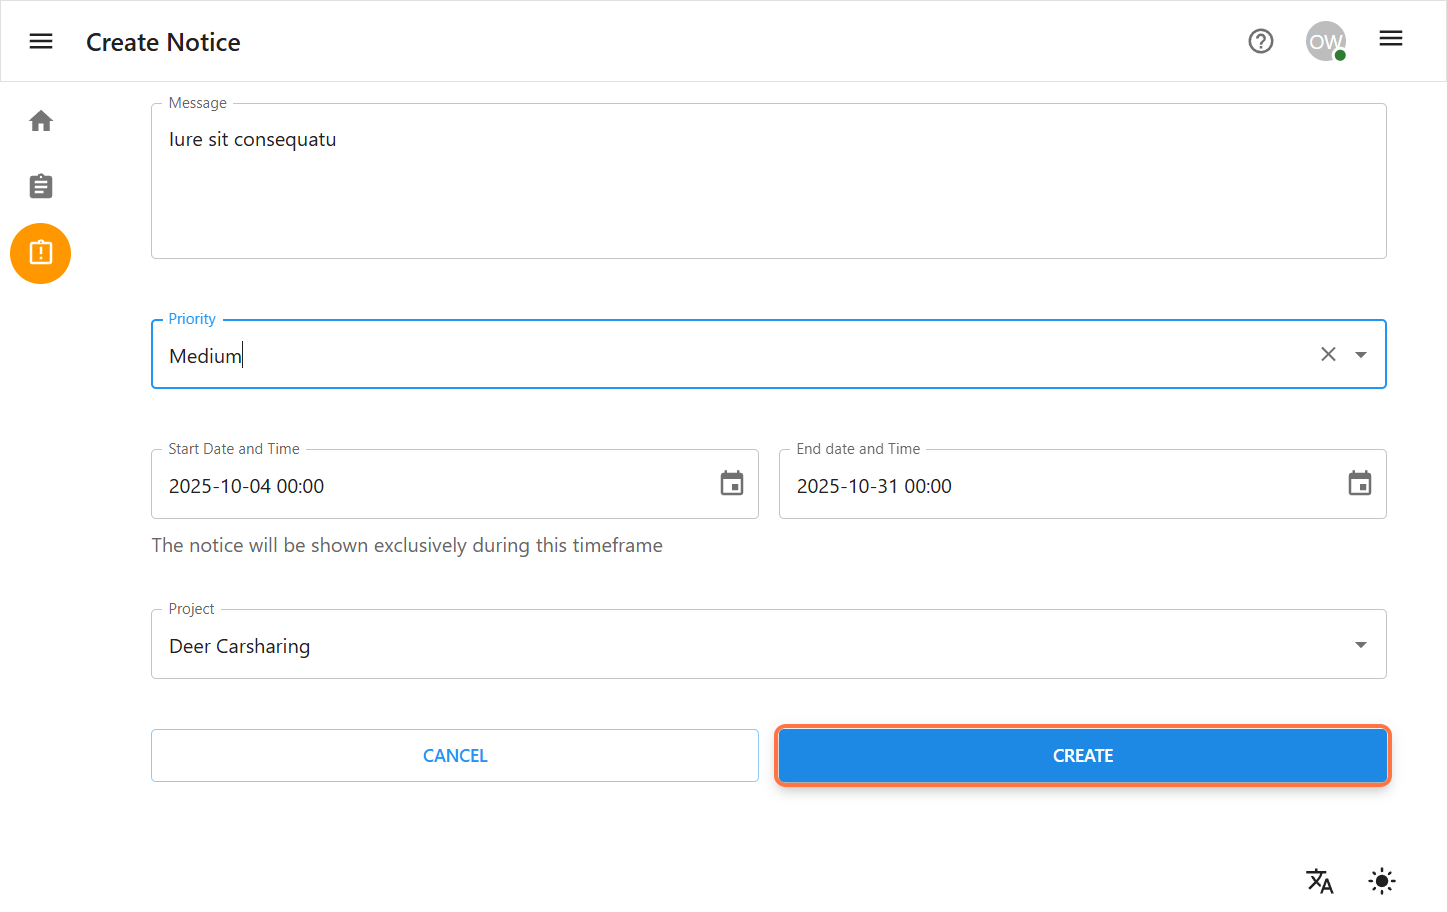
Fill out the required fields with valid data.
Title: Enter a clear and descriptive title for the notice.
Message: The main body of the notice containing the detailed announcement or information.
Priority: Select the priority level (e.g., Low, Medium, High) to indicate the importance of the notice.
Start/End Date & Time: Select the period during which the notice shoud be active. Start date and time is always before then end date and time.
-
Click the Next button to proceed to the Review page.
-
Then you will be redirected to the notice list page where you can see all the details.
1.2 Edit Notice
-
Step-by-step instructions for editing an existing notice.
-
Navigate to Notice Management
-
From the left sidebar, click on the Notice Management icon.
Select a Notice to Edit
-
On the Notice view page, find the notice you want to edit/update.
-
Select the checkbox next to the desired notice.
-
Click the Edit Notice button.
Update the Notice Details
-
You will be redirected to the Edit Notice form, pre-filled with the existing data.
-
Update any necessary fields (Title, Message, start and end Date/Time,priority and project).
-
Click the Next button and then the Update Notice button on the review page to save your changes.
1.3 Delete a Notice
-
Step-by-step instructions for deleting a notice.
-
Navigate to Notice Management
-
From the left sidebar, click on the Notice Management icon. You will be redirected to the Notice view page where all list of notice are displayed.
-
Delete a Single Notice
-
On the Notice Management page, find the notice you wish to delete.
-
Select the checkbox next to the desired notice.
-
Click the Delete Notice button.
-
A confirmation dialog will appear. Confirm the deletion to permanently remove the notice.
-
Delete Multiple Notices
-
On the Notice Management page, select the checkboxes for all notices you wish to delete.
-
Click the Delete Notice button.
-
A confirmation dialog will appear. Confirm the deletion to permanently remove all selected notices.